Raptor Innovation Summit 2026 — Registration is Live

Raptor Power User Tip: Parameters, Data Dictionaries & Signals
With Raptor, it’s easy to code-gen parameters, create data dictionaries and add signals in just a few quick clicks. Just follow along with our step-by-step walkthrough below to learn how, so you can navigate your next project more efficiently!
Modifying Parameters
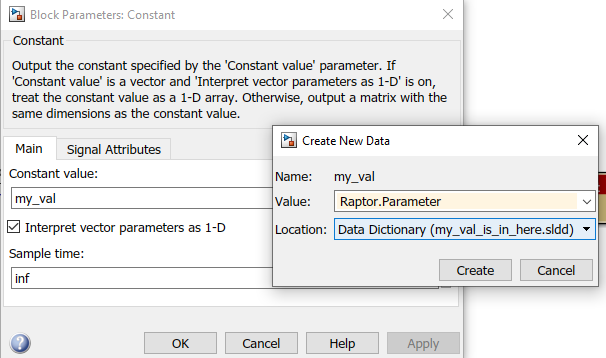
If you’re planning to use Raptor-Cal as your calibration tool, you can easily code-gen parameters for it by modifying a Simulink.Parameter to a Raptor.Parameter. Here’s how, using a constant block as an example:
1. Create the structure by typing a variable name in the “Constant Value” parameter.
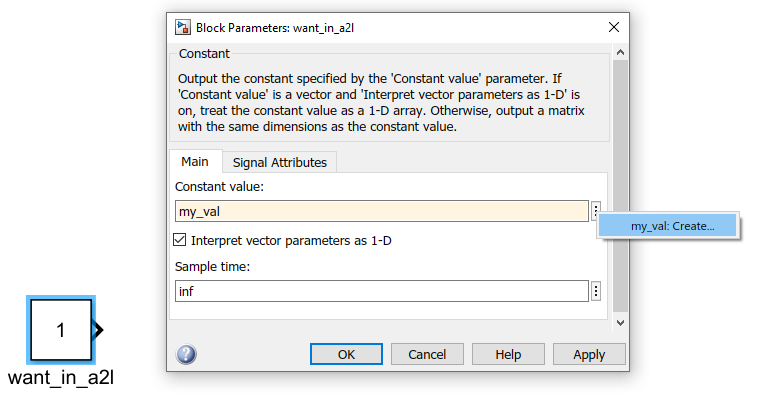
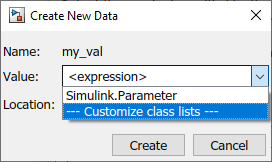
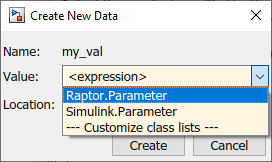
2. Include the Raptor.Parameter class in the class list.
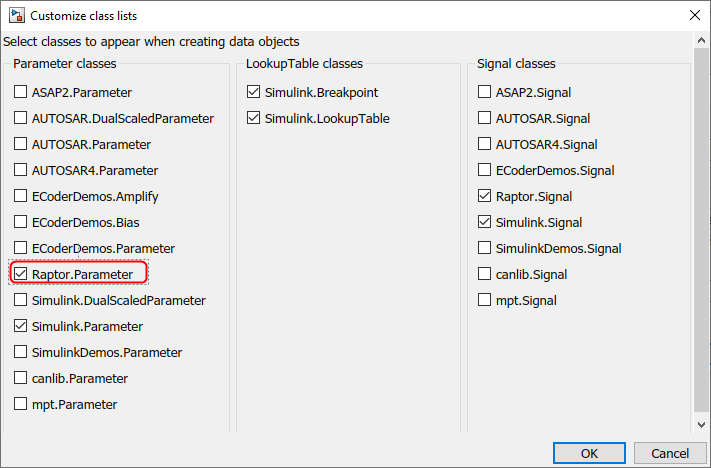
3. Now that this data class has been added, select “Raptor.Parameter” as the data class.
4. Select “Adjustment (Custom)” as the storage class.
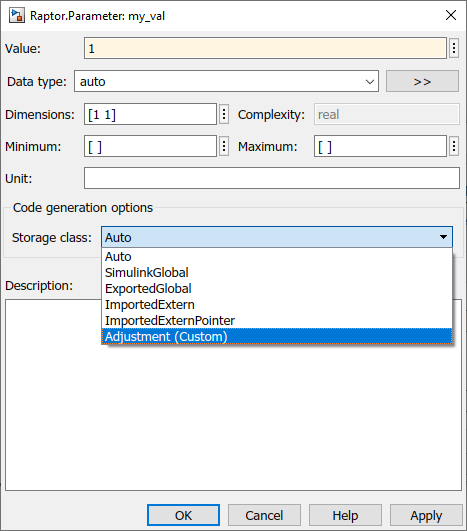
5. Choose the memory space location and data values (these are similar to the adjustment block).

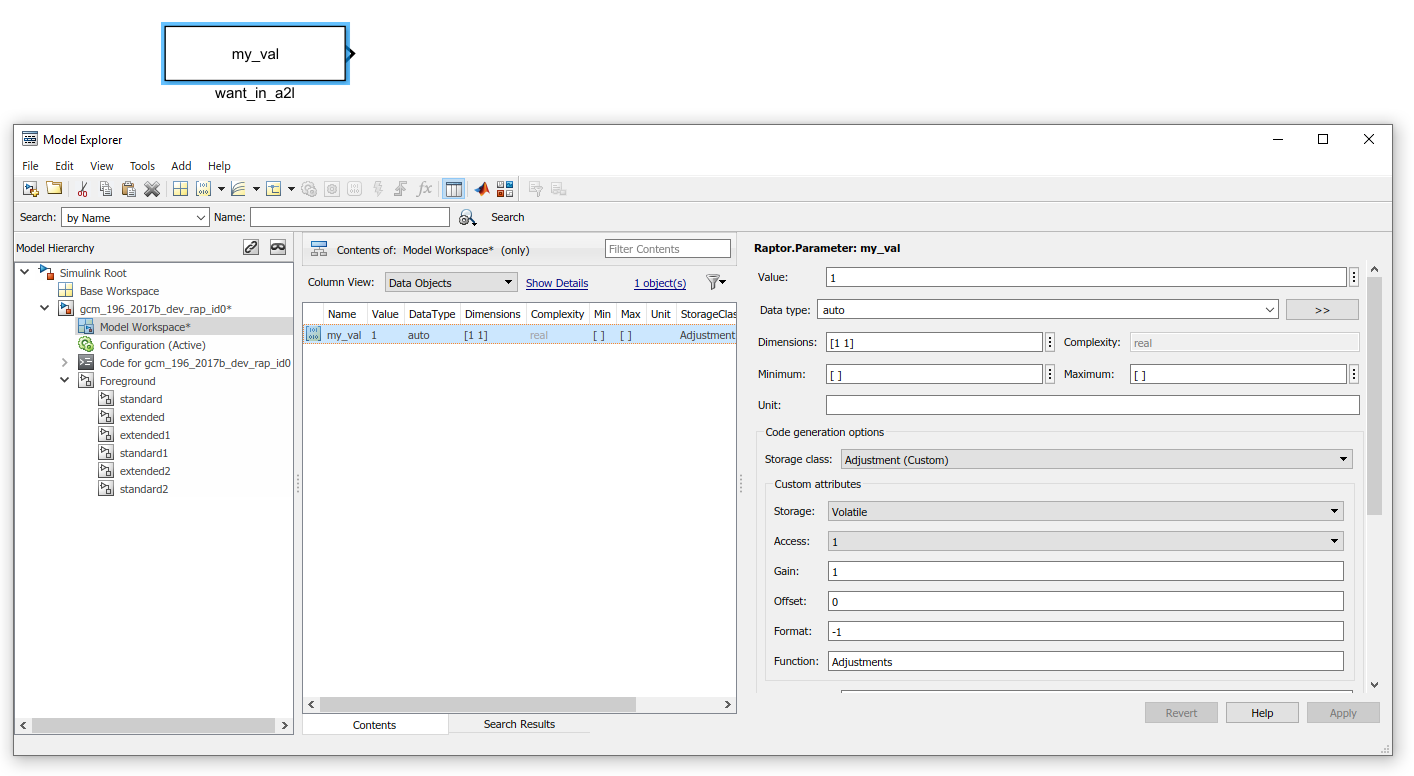
After this, it should appear in the model explorer…
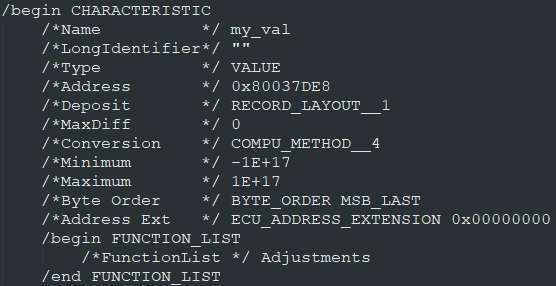
…and generate this a2l:
Data Dictionary
After successfully modifying a parameter, you can now add that parameter to a data dictionary by following these simple steps:
1. Create a dictionary and update the model to reference data from that dictionary. In this example, we’re using: dictionaryObj=Simulink.data.dictionary.create(‘my_val_is_in_here.sldd’)
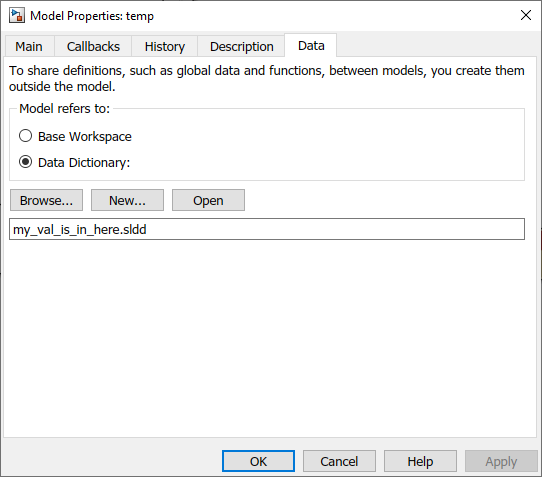
2. You should now be able to add the Raptor.Parameter to the dictionary.
Raptor Signals
After successfully creating a data dictionary, you can now add a Raptor Signal to that dictionary. Here’s how:
1. Right-click on the signal and click “Properties.” Then, name the signal and create it.
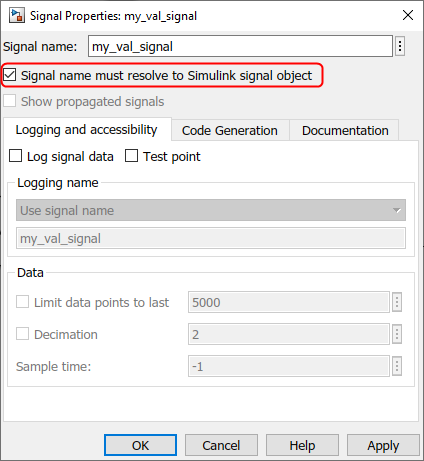
2. Right-click on the signal and click “Properties.” Then, name the signal and create it.

3. Check “Signal name must resolve to Simulink signal object”
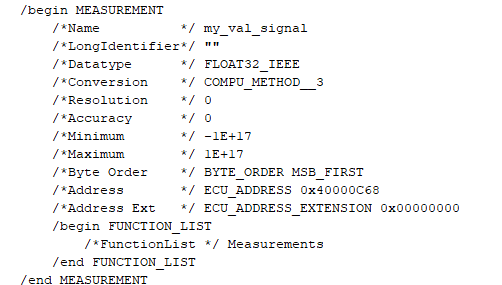
4. Then, checking the a2l, you should be able to see the parameter and signal:
Want more tips like these?
Sign up to get the additional time-saving tricks, helpful insights, and more delivered right to your inbox!