Last year’s New Eagle Raptor Innovation Summit offered valuable insights and forward-thinking solutions for the future of embedded controls and safety. If you couldn’t attend, you can still catch up by exploring the presentations in our 2024 Summit Content Repository.
One of the highlights from Day 2 of the Summit was an interactive workshop led by Controls Engineer George Reeves, who provided an in-depth look at the powerful software behind Raptor-Dev’s display-building environment. In the following sections, we’ll explore the key takeaways from George’s presentation, diving into how Raptor-Dev empowers users to streamline their HMI development and create the perfect display.
Generic vs. Raptor-Enabled HMIs
What can HMI’s do?
You’re probably familiar with Human–Machine Interfaces (HMI) in your everyday life. If you’ve used an ATM, ordered coffee from a touchscreen, or picked up your smartphone in the last hour, you’ve been engaging with HMI.
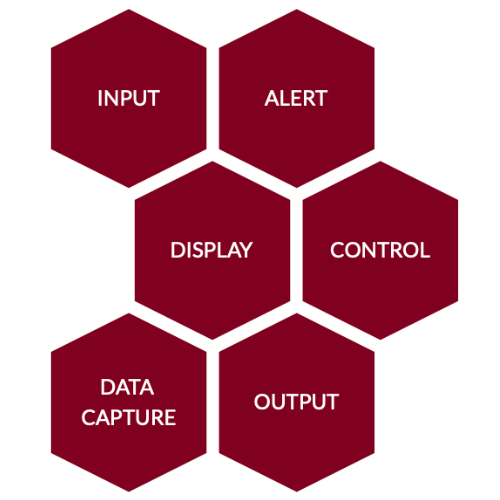
A generic HMI needs to perform three basic functions:
- Display information to a user (such as vehicle speed or order number)
- Have the ability to input data (such as a trip counter or order selection)
- Execute actions or events (such as an alert notification or printing a receipt)
HMI’s differ widely across various industries, even across a single industry. They come in lots of different sizes, shapes, and IP ratings. Even with a wide variety of choices for system connectivity, operator interactions, mounting location, and data collection, a perfect off-the-shelf solution may not exist for your use case.
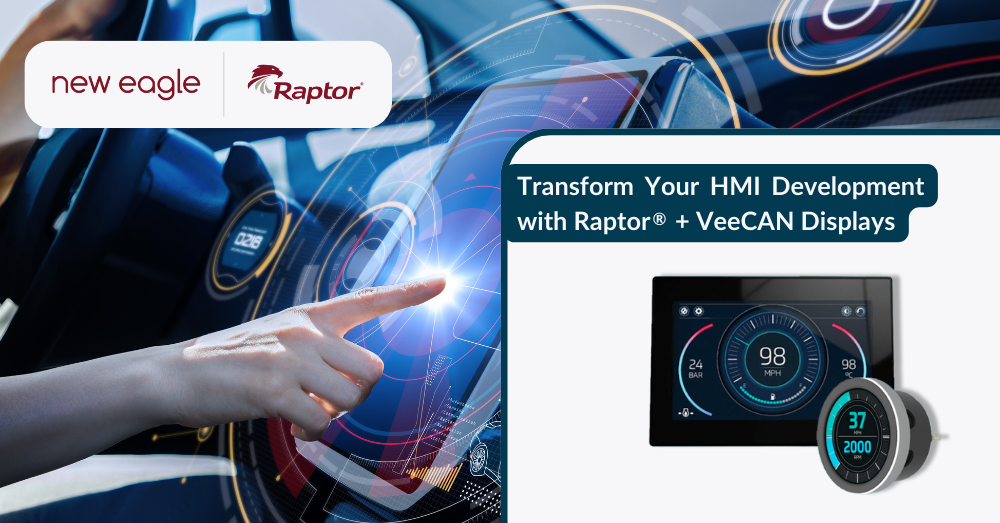
That’s where Raptor-Dev and the Raptor-integrated lineup of VeeCAN Displays come in. With Raptor-Dev, you can easily create fully customized HMI applications tailored to your needs. Whether you need a touch screen, button-enabled interface, PCAP, waterproof design, or something else, VeeCAN Displays offer the flexibility to match your exact requirements. The best part? HMI customization with Raptor-Dev is intuitive and user-friendly, the (just five-step!) process allows you to take full control, from code generation to testing, simplifying the entire development process and saving you time.
Behind the Scenes of Raptor’s Display-Building Environment
Let’s take a peek into Raptor Dev’s display-building software components, library, and workflow, plus a few bonus features that make Raptor-Dev universally appealing.
Software Components
Raptor-Dev’s display-building environment is a MATLAB/Simulink custom-coding interface via Raptor, so you get the best of all possible worlds: MATLAB’s analysis, design, and optimization along with offline data processing, plus Simulink’s block diagram-based modeling and offline simulation.
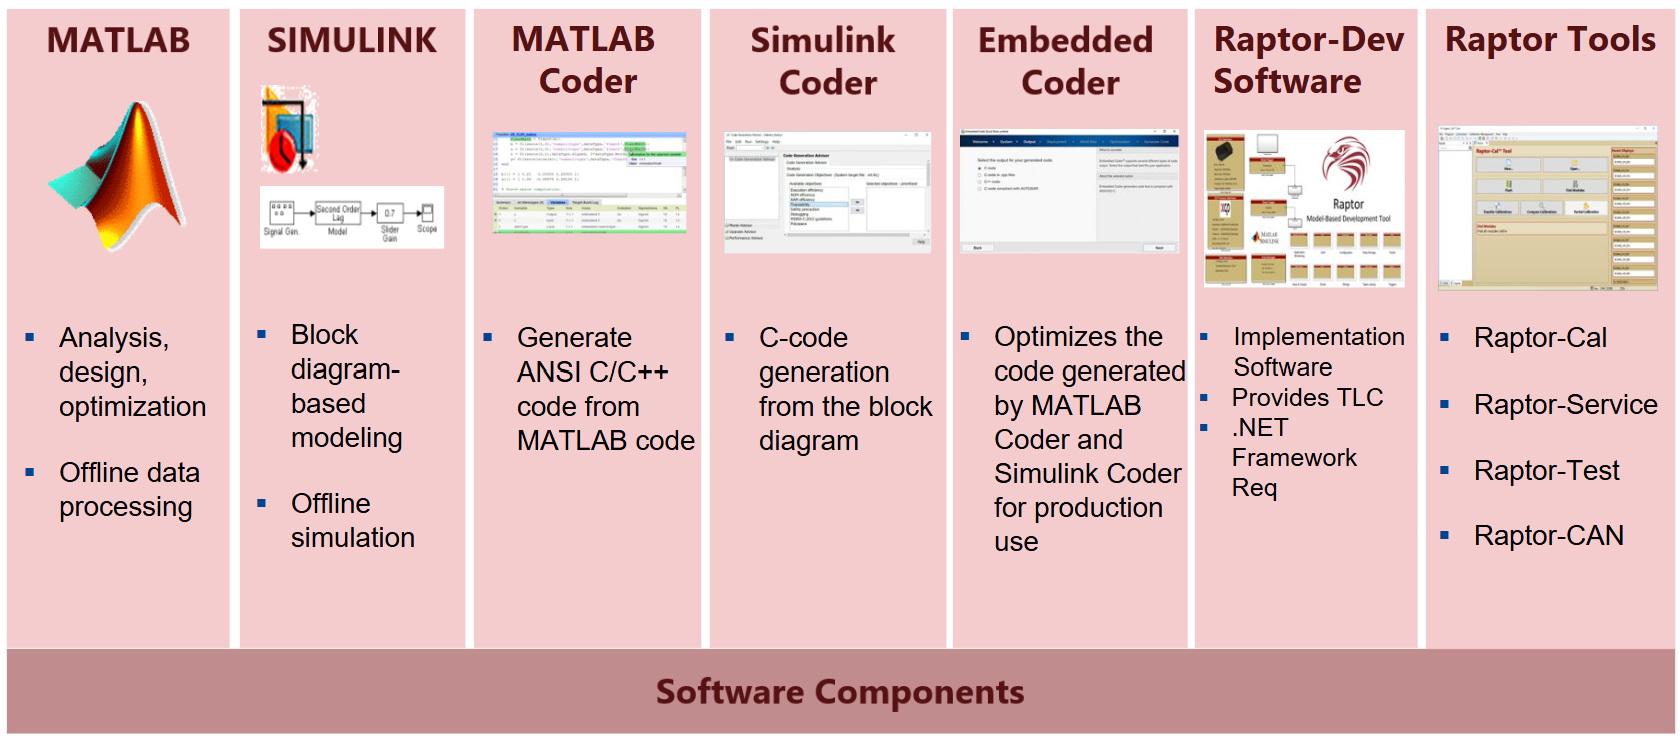
Custom Display Building Software Components
Display Library
Useful templates are already built into the Raptor-Dev environment, including base software templates for all Raptor VeeCAN units. They’re ready for immediate use with no additional libraries required. Every step is integrated for you to develop a closed-loop control system.
The templates include a variety of software examples, such as:
- Multiscreen application
- Touch gesture/button control
- USB datalogging
- Sample images
- Live gauges
- Dynamic text generation
- Example J1939 implementation
- Buildable PC simulator (More on this below!)
In the library, you’ll find basic drawing and display functions for menu systems, prefab/premade gauge systems, and screen functions (including touchscreen). There’s also plenty of support materials for the Base Raptor-Dev Library as well as Controls Foundation and J1939.
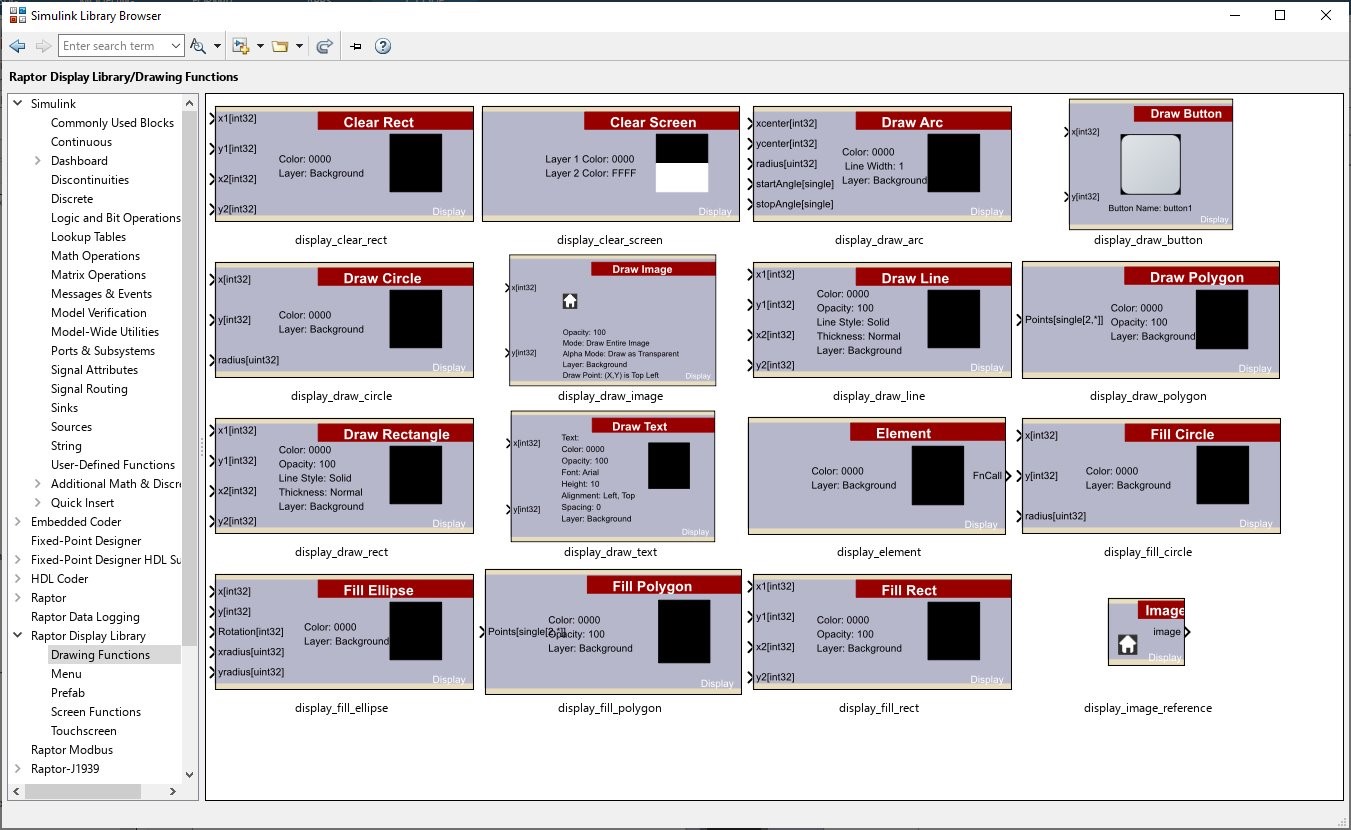
Raptor-Dev Display Library Drawing Functions
PC Simulator
Streamline your display development process with the buildable PC simulator for real-time debugging and iterative visual updates. It supports Kvaser CAN tools and devices, as well as virtual button inputs/gestures. You can even use the simulator as a standalone device.
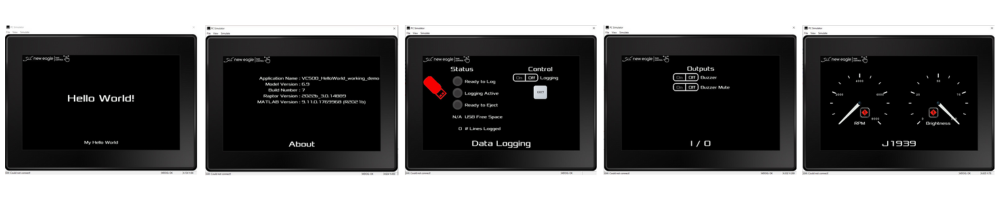
Raptor-Dev Display PC Simulator
Development Workflow
Raptor-Dev breaks your VeeCAN development down into a manageable workflow. Start by creating a preliminary VeeCAN model design, then add and modify your screens and functionality. This includes graphics and image design as well. Build your design and evaluate it with the virtual simulator.
Next, you can implement I/O and/or a CAN rebuild as necessary. Use Raptor-Cal to flash VeeCAN before you test it in a vehicle setting or test bench. Of course, you can always implement new ideas and revise your model design.
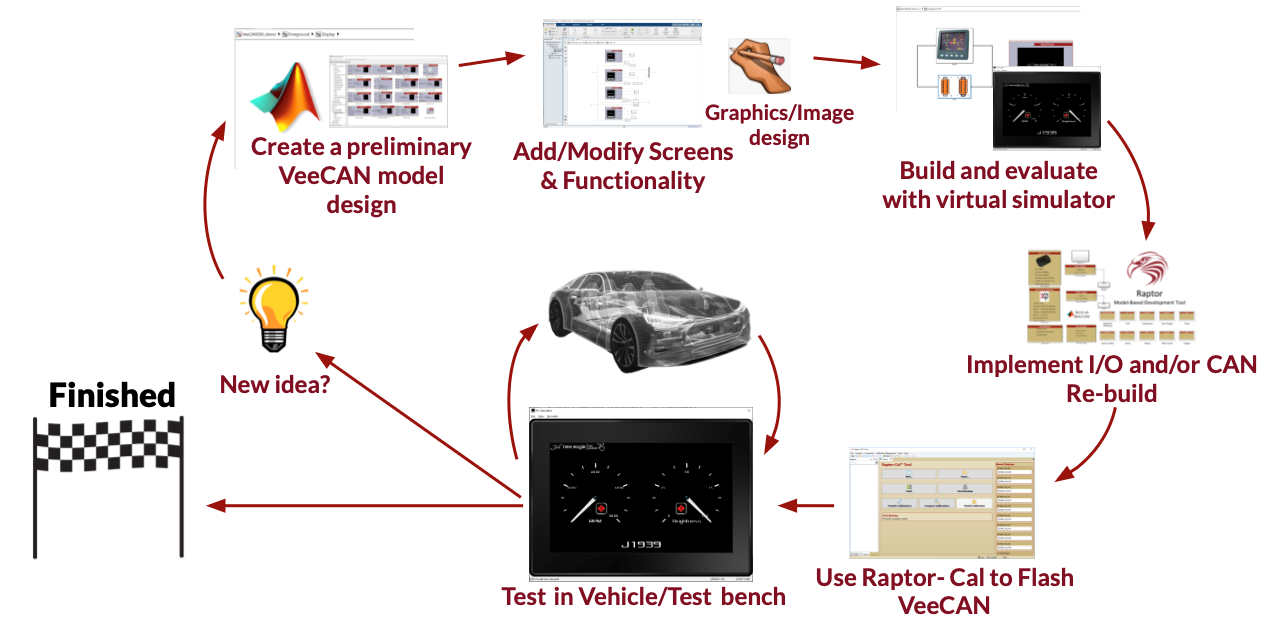
Raptor-Dev Display Development Workflow
With Raptor-Dev, you can create exactly the display you need—from CAN and Serial communication interfaces, to capacitive and resistive touchscreens—with custom data capture available. Plus, enjoy additional calibration and service tools with Raptor-Cal, Raptor-Service, Raptor-Test, and Raptor-CAN.
Universally Appealing Bonus Features
Display Data Logging
Data capture is a universally useful tool to capture, store, and display datasets for analysis, trend identification, and forecasting. In Raptor-Dev, you can design internal software signal logging as well as custom logging software features like event capture, DBC phrasing, and CSV formatting.
USB Software Reflash
You can leave your laptop on your desk and go mobile with USB-based reflashing. Raptor-Cal and Raptor-Service provide a built-in display packager, meaning you can increase your field deployment options by going mobile.
Streamline Your Display Development With Raptor-Dev.
Want to learn more about New Eagle’s industry-leading solutions from our 2024 Innovation Summit? You can check out our Summit Content Repository today! And be sure to keep a lookout for our upcoming 2025 Raptor Innovation Summit – registration opening soon!